

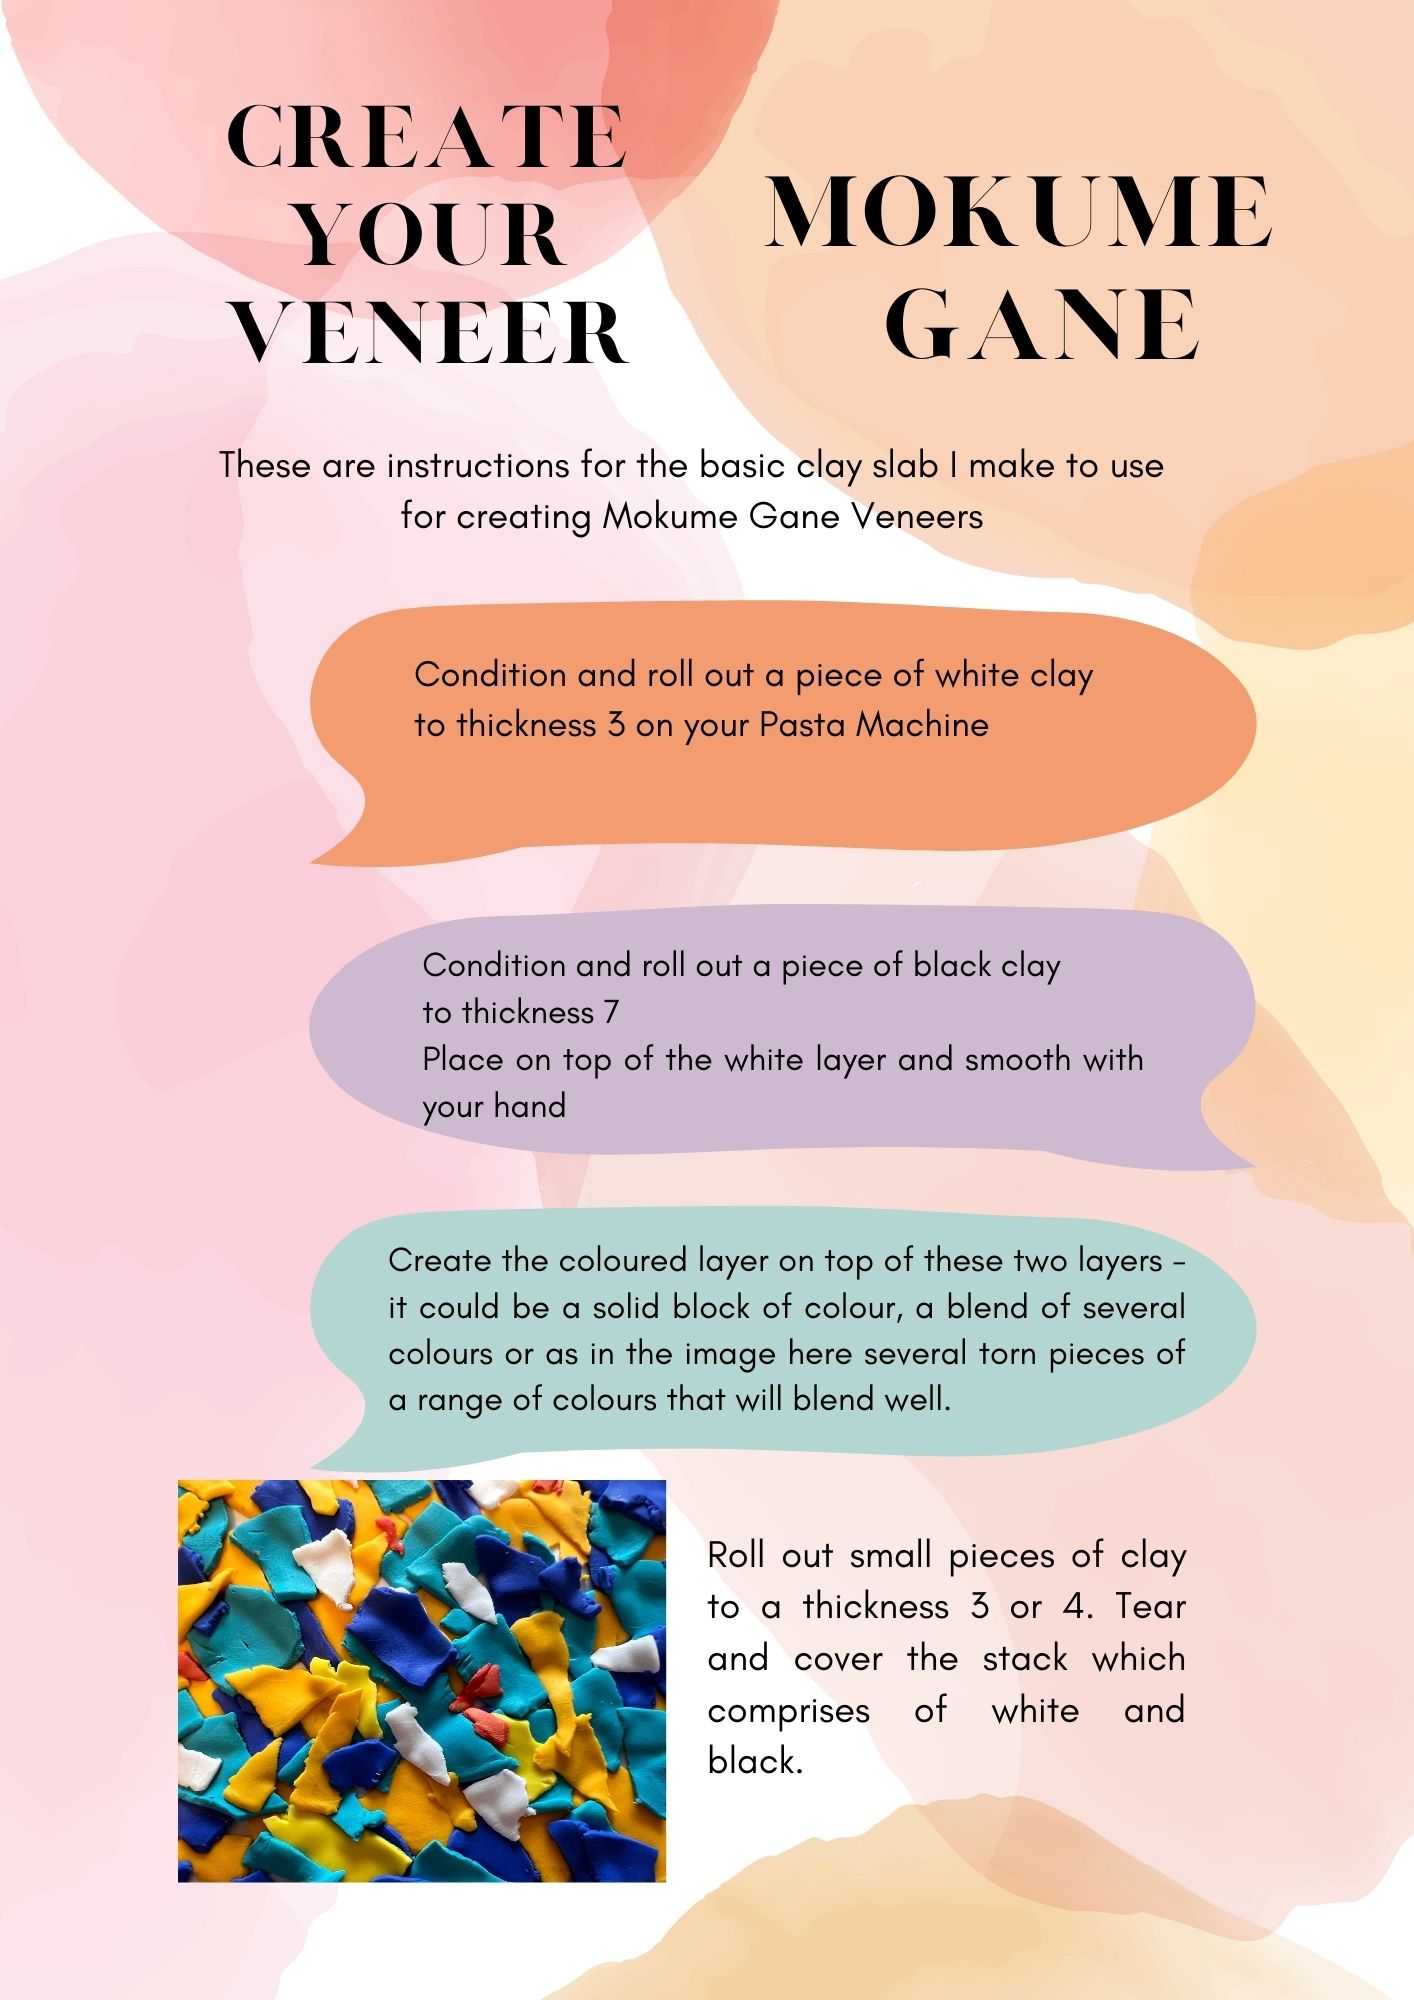
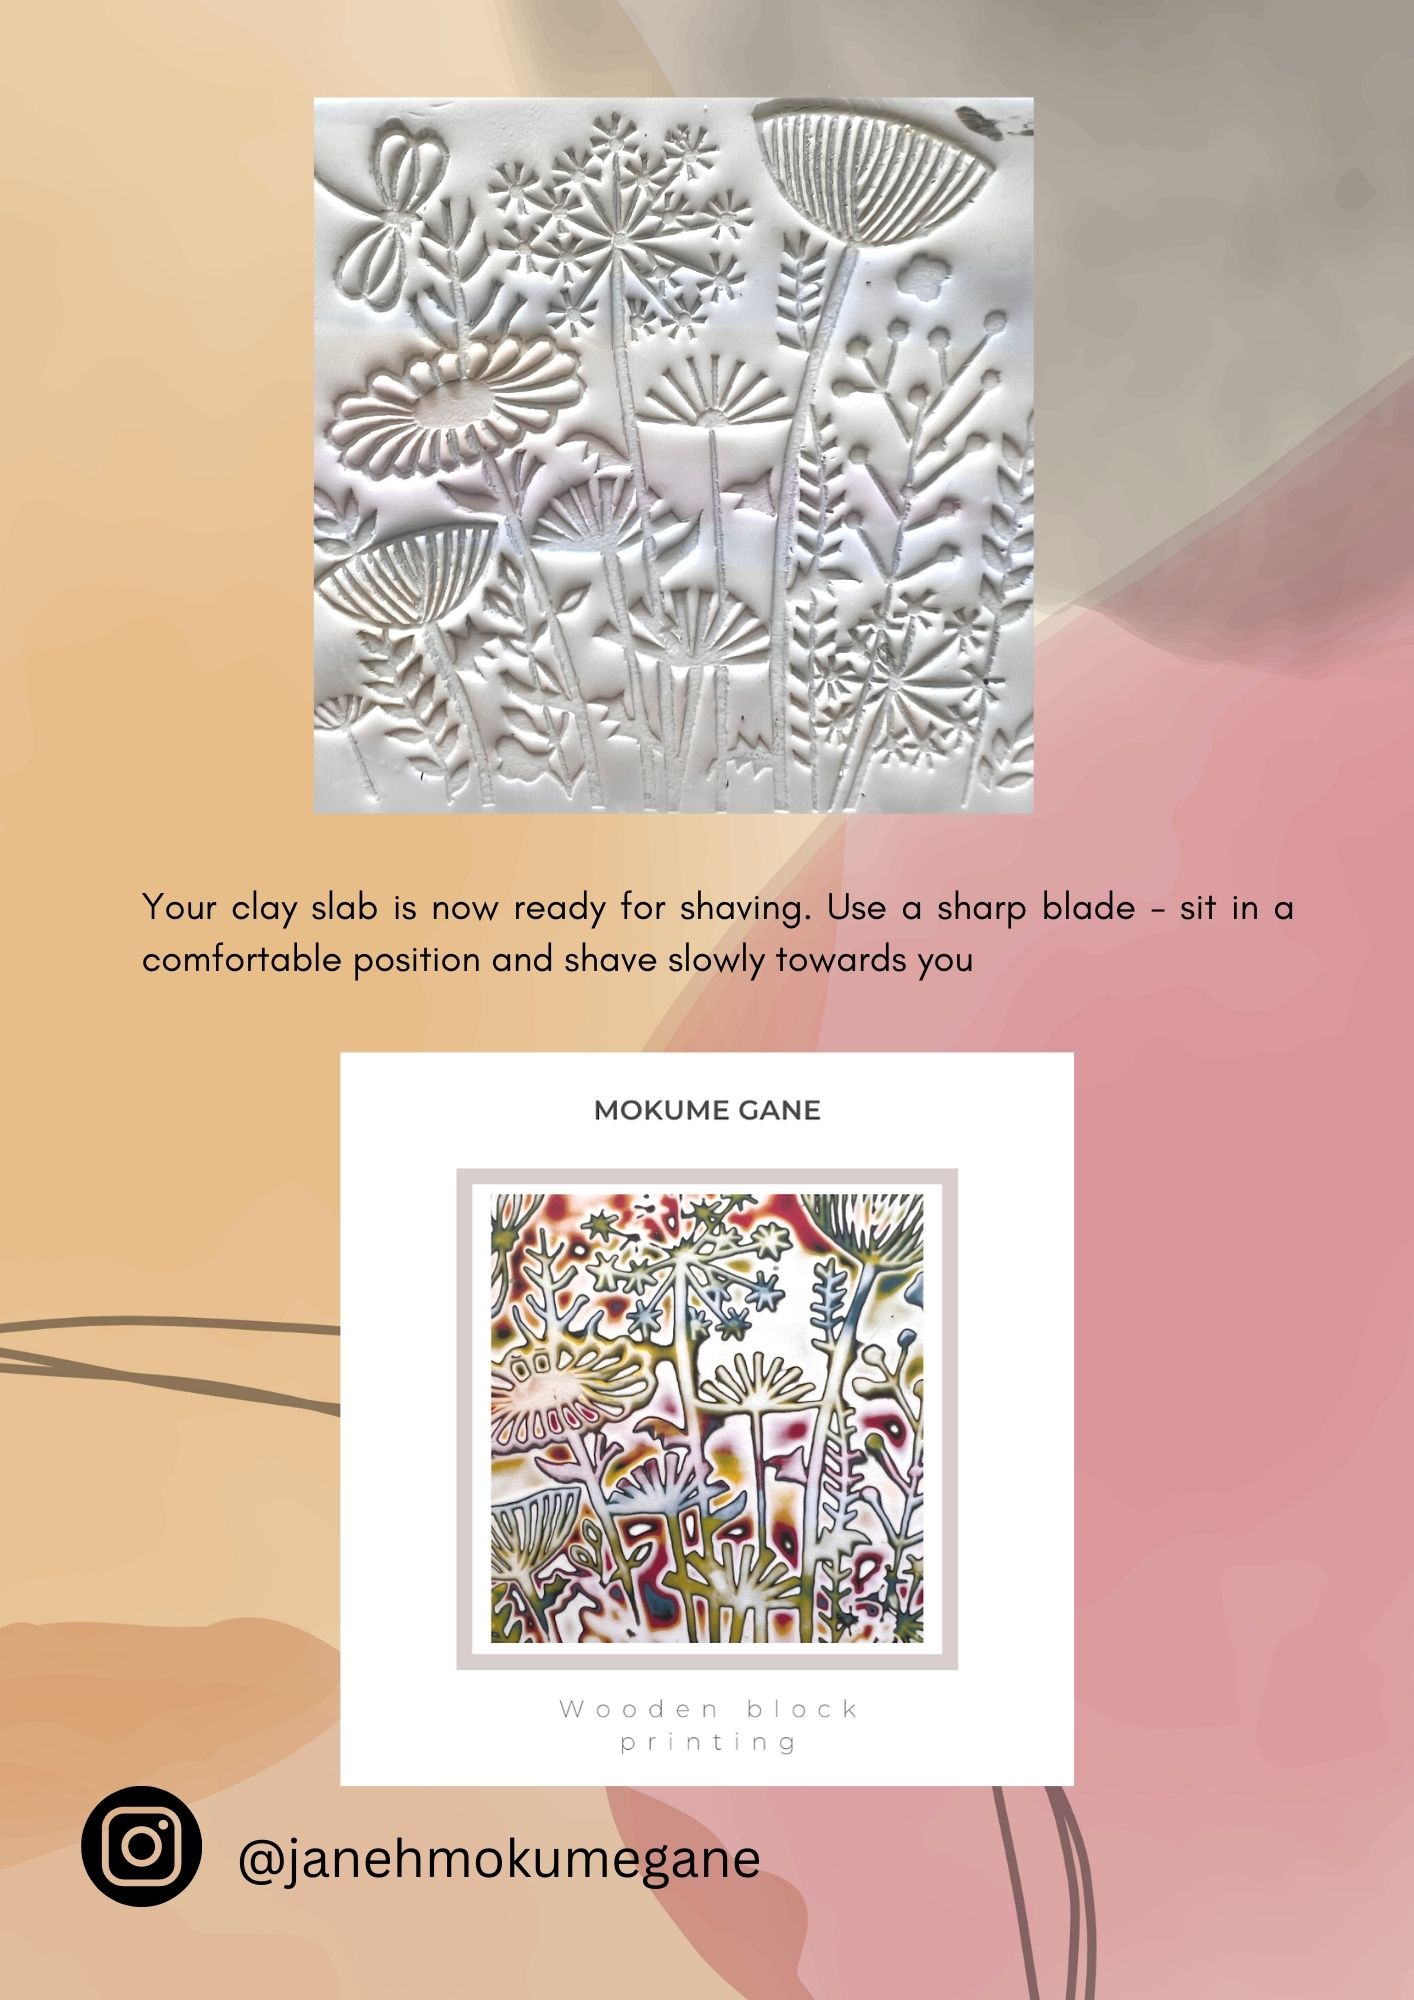
Thank you everyone for your kind comments on my Polymer Clay booklets (see previous posts). I have had some people saying they are still struggling and so I’ve done a really basic outline of how I create my slab ready for shaving. I hope this will work as a guide for you. Any questions just get in touch @janehmokumegane on Instagram. This is a beginners basic guide! Jane x


You are amazing Jane! Just wanted you to know your work is simply marvelous!
You are so kind thank you xx
Jane thank you so much for this basic tutorial and all your information you share.
Hello, your results are more than fabulous, i’m mesmerised by your pieces! i’m going crazy because i keep failing to get just one thin black line. How come in the final stack are 8 black sheets, but yet, after shaving, is only 1 black line? Did you put the stack through the thickest setting after each cut&stack? I get the closest without any cut&stack and with the black sheet towards the top. I’m doing something wrong here and i’m trying to understand what. If you have the time and wish to enlighting me… thank you so much!
Hi , thank you for your comments, yes there will be several very thin lines if black in your stack – make sure the original black layer is on your thinnest setting. When I roll the stacks through I do use the thickest setting. When you press your texture stamp in push it down really well – try a Melanie Muir one as these are quite deep. Shave slowly but ad deeply as you can whilst still keeping the pattern. You can put the black layer under the top white layer but this means that any white showing will be grey so I prefer to put it next to the bottom of the original stack, hope this helps x
Thank you very much. Unfortunately, i don’t like my results after 3 times cut&stack, it doesn’t look like your last photo, it has 3-4 thin black lines as stamp contour, muddy bits of colors. I don’t have any Melanie Muir’s stamps, i did use Lisa Pavelka’s. I tried different ways, just one cut&stack seems better for me, closer to your results (maybe my clay is softer?). Black under the colors seems to change the hue of the colors, if it’s on top of the colors it doesn’t, no grey white for me. Thank you for this experiment! Also, thank you for the workbooks! It’s a brilliant ideea to keep records of the experiments ( descriptions and photos), it does help a lot.
The only thing I can think is the way you are stacking? Don’t flip the cut half over as then your blacks will be closer together? If I have time I’ll video the process at some point x
Oh, no, I don’t flip it as i stack. I love all kinds of mokume, it’s my favorite technique. I keep trying to get a clear contour of the stamp, splashes of colors and avoid crowded pieces. I noticed that the thickness of the sheets is also important in this technique, not only the order from top to bottom. What defies my logic (and practice) is how is possible to shave the 8 black sheets stack and get just one black line. A video will be useful, exemplifying the written tutorial. Thank you again, you are very kind.
Today I tried again, this time with a hard clay… It was hard to stamp it, so I choose to press some tools in to create a design… and I got one black thin line contour! It worked just as you described! It seems that the consistency of the clay is also important. For very soft clay is better to cut&stack just once to get same results, because is soft it “moves” more (to the sides) when pressed. Now I understand why I didn’t get the results I was looking for.
Oh I’m so glad it worked!
Jane, you are such a blessing to all of us, and I thank you most sincerely for all the effort you put in to informing and educating us on this wonderful technique. Thank you so much!
Oh thank you so much Roxanne, that’s really kind of you xx
Have you ever tried using slices of canes for your colored layer? Just curious. Just made a new one, and I’m thinking of trying it.